

Creating a grief, or mourning doll is a powerful way of both honouring and processing grief. Throughout history we have created symbolic objects to connect to in our grief from death masks to mourning jewellery.
A doll can serve as a vessel for grief, offering a space to hold and honour your sorrow. It can become a tangible connection to the memory of a person, from incoporating remnants of clothes or jewellery. A doll can also be a dedication to a place, through using natural objects or an honouring of our beloveds in winged, four-footed or swimming form. Dolls can take all shapes and forms, inviting us to engage with our loss in a deeply personal and physical way.
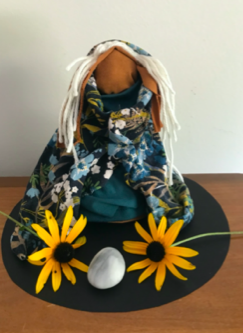
Oracle dolls - an assemblage of materials which speak to love of a place
Through the act of creation and remembrance, the doll allows you a way to both channel and transform your emotions, allowing for the surfacing of feelings that might otherwise remain hidden that you might repress. Dolls have the ability to hold the essence of someone or something you’ve lost, serving as a focal point and a reminder to take time for reflection, healing, and remind us that a release of grief is normal and healing.
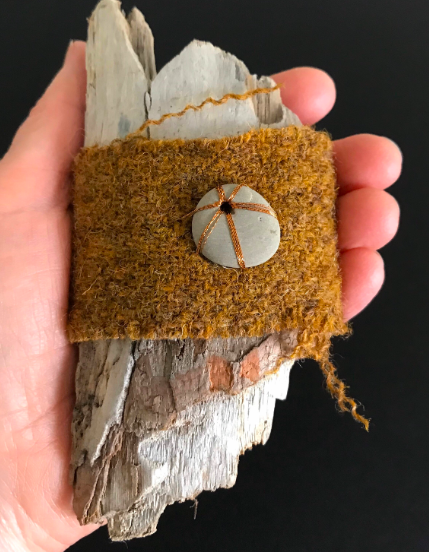
We have always turned to totems and talismans to help us hold our grief, drawing on the power of physical objects to contain and express deep emotions, giving grief form, providing us with something we can touch and hold.
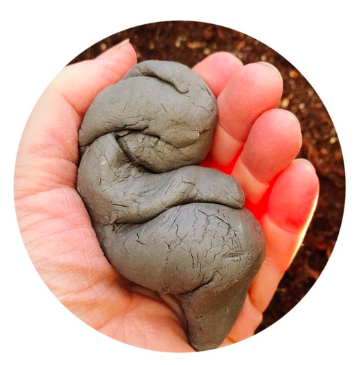
Doll making is an ancient practice, going back through countless generations to the hands that carved figures like the Women of Willendorf. I like to envisage an ancient ritual of a doll made from clay, and the hands that shaped her, each part of the process a gesture infused with memory, sorrow and love - perhaps the honouring of a mother, who in death was honoured as returning home to the Great Mother. And for peoles who lived very different lives from us, perhaps a death was celebrated with more joy than grief.

A Doll as Altar
We can engage with dolls as dolls as altars, bags become receptacles to hold prayers, or notes to those that have died. The dolls themselves dressed in fabrics which were worn in life. Names and words can be stitched into the fabric, sometimes on the inside, hidden and held. Colors can be mourning blacks and greys or celebratory patterns. The doll itself can become part of a central shrine surrounded by images and photos, offerings and natural materials.
I view doll making as an ancient practice, back through the countless generations to the hands that carved figures like the Women of Willendorf. I envisage an ancient ritual of a doll made from clay, perhaps an honouring of a mother, who in death was returned to the Great Mother.
In making a grief, or mourning doll we continue this ancient tradition, which allows us to engage with our grief in a tangible way. The doll becomes a container for memory, sorrow, and love, just as it might have been for our Palaeolithic ancestors.

This fabric doll requires only basic doll-making knowledge and simple sewing skills. I’ve designed it so that you could even create it using just two old T-shirts, yet the pattern allows for you to add your own creativity and personalization.
Materials needed:
4 pieces of fabric (2 cut from a t-shirt, one for a dress and 4th for a cloak). Your cloak can be any size as you can wrap it around the doll. At a minimum use a piece of fabric 20 inches x 12.
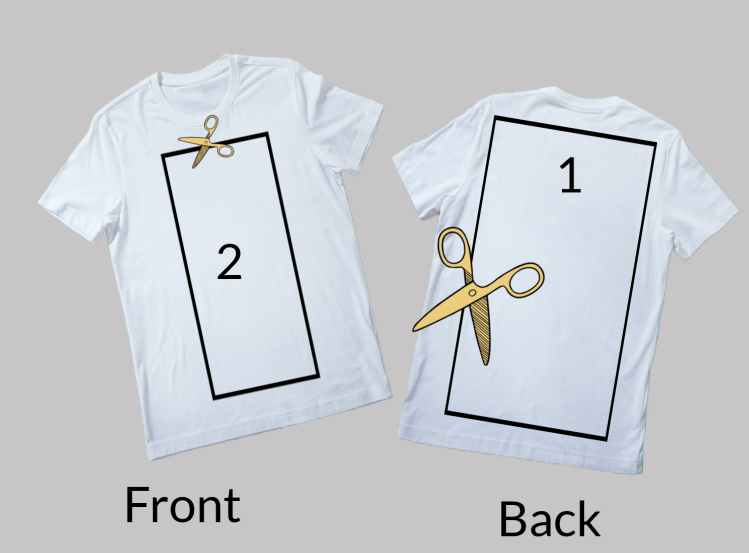
T-shirt into 2 pieces, cut offs used for scraps (see diagram below)
Scarf or other fabric for dress and cloak
Hair - wool roving, wool yarn or cut up fabric
Scissors
Needle, thread
Pins (Helpful but not required)
Cardboard circle 3 1/2 inch diameter (8cm)
Approximate sizing for your T-shirt peces, or measurements if you are cutting fabric. Please note these sizes are approximate
1 Body Core. Back of the T-shirt - Roughly 26 x 20 inches (66 X 50 cm)
2 Covering the body, creating the head and neck. Front of the T-shirt 16 x 9 inches (40 x 22 cm)
Create Your Own Carboard Tube
Cut a piece of card roughly 4 inches x 10 inches
Write intentions, draw, use symbols or collage images
Use something to roll the card, I used a glue stick
Have your decorated side facing in , or out or use both sides
Secure with a piece of sellotape
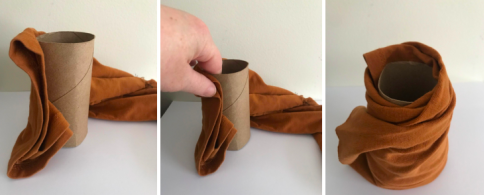
1. Creating the Body
You can use a paper towel roll tube or create your own with cardboard - you might wish to write intentions onto your cardboard
Use the back of the T-shirt or similar size fabric. Fold it lengthways and fold again.
Roll your fabric around the empty paper towel roll tube roll tube. Sew the end of the fabric onto the fabric
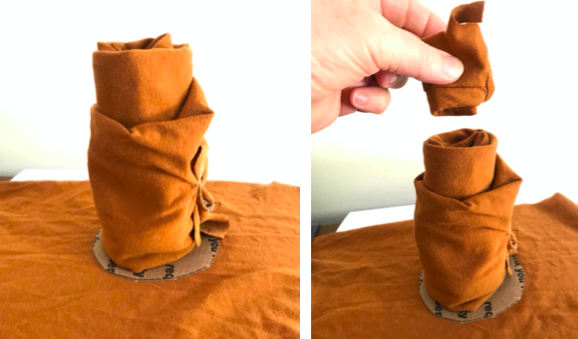
2. Creating the Head
Lay down the fabric from the front of the T-shirt
Sit the body on the circular piece of card, move towards the back of the fabric
Fill the card roll with scraps of fabric up to the edge of the card roll
Take a piece of fabric roughly 4 inch x 4 inch, (10 cm) fold it up,
Add it lengthways in the middle of the card roll. This forms the head shape

3. Creating the Neck & Head
Pull the front of the fabric over the top of your doll, then tuck the sides round to the back and pin
Roll up the length of the fabric, and pin to the back of the body
From the front take a piece of yarn, or thin strip of fabric and tie it tightly around the top to create a head (smooth out the fabric where the face is)


Sew in Place
Take out pins and sew fabric in place
Sew the folded fabric at the back in place
Pull those sides round to the back and sew. This excess fabric helps stabilize your doll
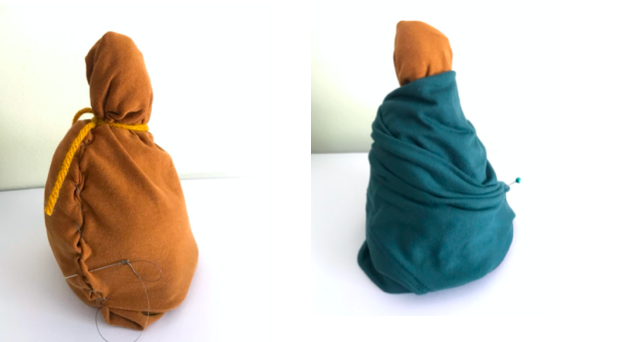
Dress
Use a third piece of fabric, roughly 16 x 6 inches. Size really doesn’t matter as your going to wrap the fabric around the body, then drape it and then sew it into place
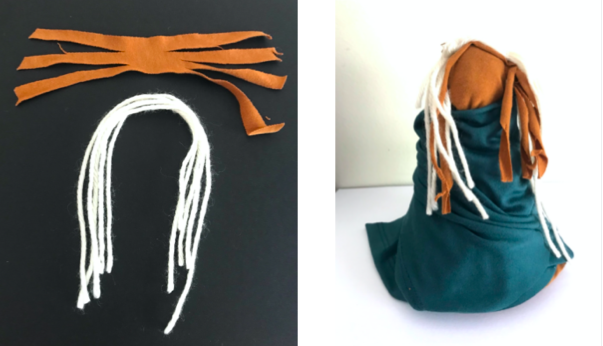
Hair
Cut several lengths of yarn whatever length you want
Sew onto the top of the head and then go around the head in a semi circle sewing the hair on
Another option is to use a strip of T-shirt fabric, cut into strips at both sides, leaving a middle part that you can sew onto the head
Or use a mix of both
You could also use wool roving

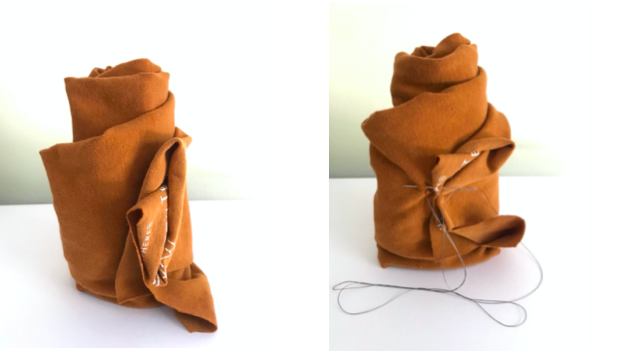
Cloak
Your cloak can be any size as you can wrap it around the doll. At a minimum use a piece of fabric 20 inches x 12. Use any size, wrap it around the doll and see if it works!
Work out the middle of your cloak and sew a few stitches into the middle of the hair to keep it in place
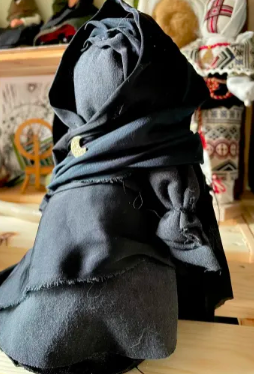
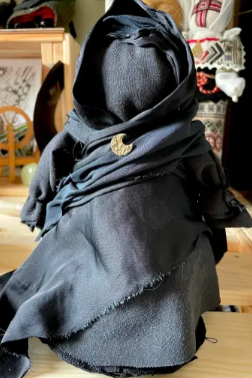
In the photos above I’ve hemmed the raw etches of the fabric
The bottom of the clock fabric sits wider than the doll
Adding a circular piece of fabric creates a small focus or altar to add some objects or offerings