

Materials needed:
4 pieces of fabric (2 cut from a t-shirt, one for a dress and 4th for a cloak). Your cloak can be any size as you can wrap it around the doll. At a minimum use a piece of fabric 20 inches x 12.
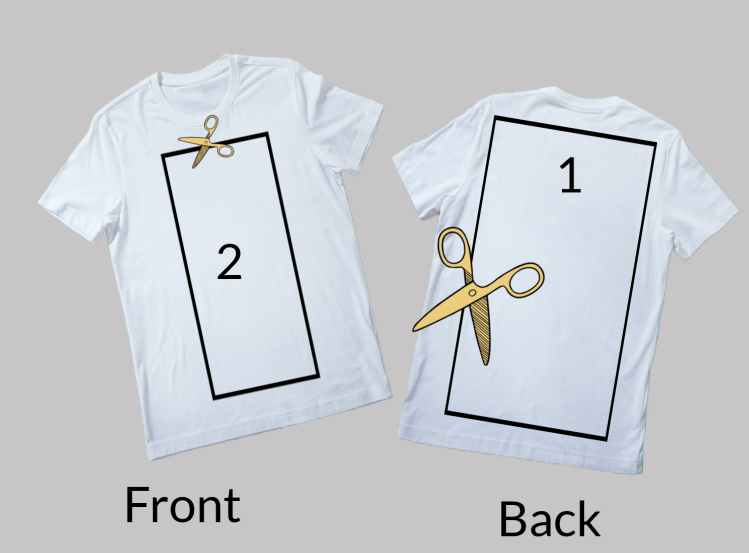
T-shirt into 2 pieces, cut offs used for scraps (see diagram below)
Scarf or other fabric for dress and cloak
Hair - wool roving, wool yarn or cut up fabric
Scissors
Needle, thread
Pins (Helpful but not required)
Cardboard circle 3 1/2 inch diameter (8cm)
Approximate sizing for your T-shirt peces, or measurements if you are cutting fabric. Please note these sizes are approximate
1 Body Core. Back of the T-shirt - Roughly 26 x 20 inches (66 X 50 cm)
2 Covering the body, creating the head and neck. Front of the T-shirt 16 x 9 inches (40 x 22 cm)
Create Your Own Carboard Tube
Cut a piece of card roughly 4 inches x 10 inches
Write intentions, draw, use symbols or collage images
Use something to roll the card, I used a glue stick
Have your decorated side facing in , or out or use both sides
Secure with a piece of sellotape
1. Creating the Body
You can use a toilet roll tube or create your own with cardboard - you might wish to write intentions onto your cardboard
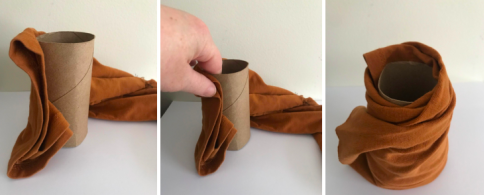
Use the back of the T-shirt or similar size fabric. Fold it lengthways and fold again.
Roll your fabric around the empty toilet roll tube. Sew the end of the fabric onto the fabric
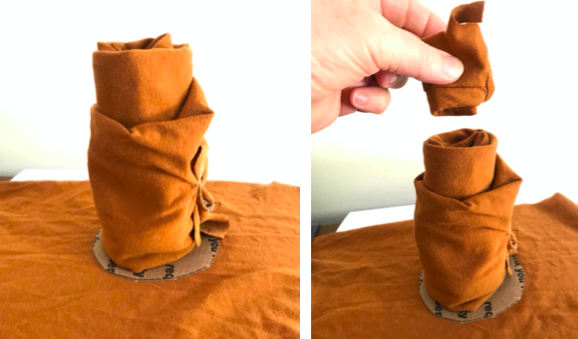
2. Creating the Head
Lay down the fabric from the front of the T-shirt
Sit the body on the circular piece of card, move towards the back of the fabric
Fill the toilet roll with scraps of fabric up to the edge of the toilet roll
Take a piece of fabric roughly 4 inch x 4 inch, (10 cm) fold it up,
Add it lengthways in the middle of the toilet roll. This forms the head shape

3. Creating the Neck & Head
Pull the front of the fabric over the top of your doll, then tuck the sides round to the back and pin
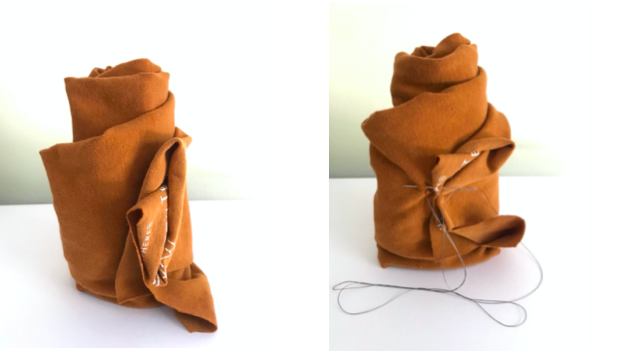
Roll up the length of the fabric, and pin to the back of the body
From the front take a piece of yarn, or thin strip of fabric and tie it tightly around the top to create a head (smooth out the fabric where the face is)


Sew in Place
Take out pins and sew fabric in place
Sew the folded fabric at the back in place
Pull those sides round to the back and sew. This excess fabric helps stabilize your doll
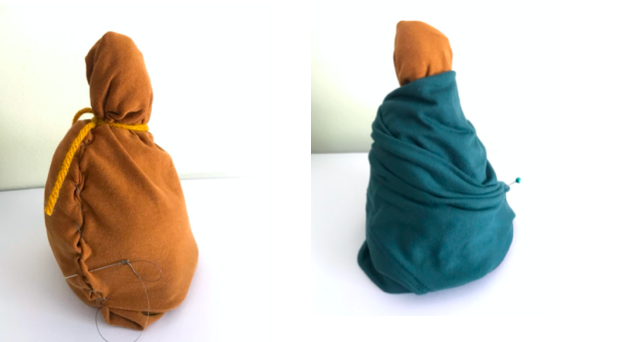
Dress
Use a third piece of fabric, roughly 16 x 6 inches. Size really doesn’t matter as your going to wrap the fabric around the body, then drape it and then sew it into place
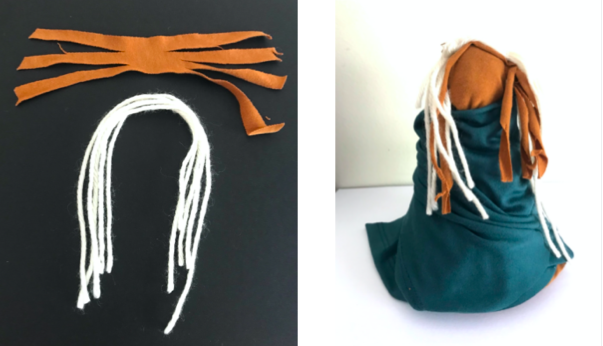
Hair
Cut several lengths of yarn whatever length you want
Sew onto the top of the head and then go around the head in a semi circle sewing the hair on
Another option is to use a strip of T-shirt fabric, cut into strips at both sides, leaving a middle part that you can sew onto the head
Or use a mix of both
You could also use wool roving

Cloak
Your cloak can be any size as you can wrap it around the doll. At a minimum use a piece of fabric 20 inches x 12. Use any size, wrap it around the doll and see if it works!
Work out the middle of your cloak and sew a few stitches into the middle of the hair to keep it in place
In the photos above I’ve hemmed the raw etches of the fabric
The bottom of the clock fabric sits wider than the doll
Adding a circular piece of fabric creates a small focus or altar to add some objects or offerings