

Required Materials:
- 2 pieces of A4 card or any form of cardboard (even cereal box)
- Double sided tape
- Scissors
- Things to draw with (paint, pens and pencils)
- Collage materials – magazines and glue stick
Creating the Template
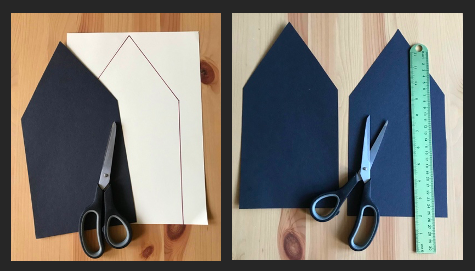
Print out the paper template and cut it out
Set the paper template onto card, or whatever material you are using for the shrine
Cut out 2 templates

Shrine Front
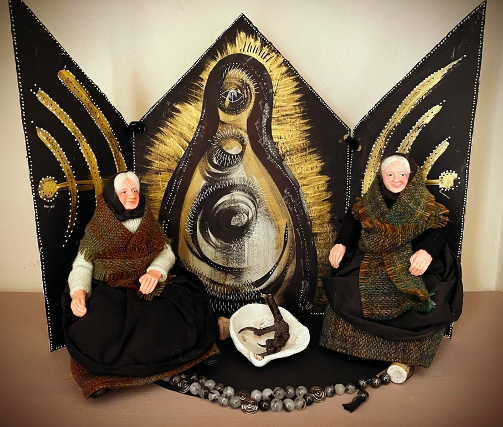
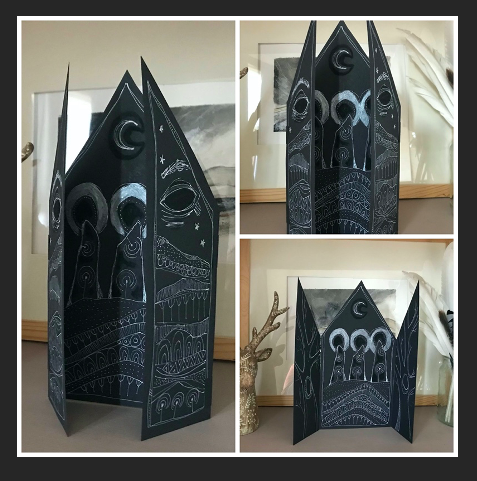
Instead of making tabs to secure the sides here I used a hole punch and threaded through yarn which I knotted and platted to create tassels. As I used a thicker card (from the back of a notebook) I sewed on some objects to the front, which I attached yarn to use as a tie.

You can draw around the above template to make it bigger or smaller
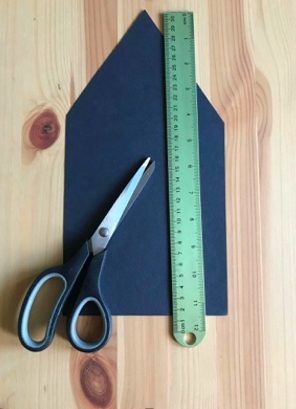
Fold one template in half and cut length ways or for a smoother edge measure with a ruler, mark with pencil and cut down the middle

Attaching the Panels
Now you have the three panels for your shrine.
Depending on your design you may wish to do this process before or after you’ve decorated all the panels.

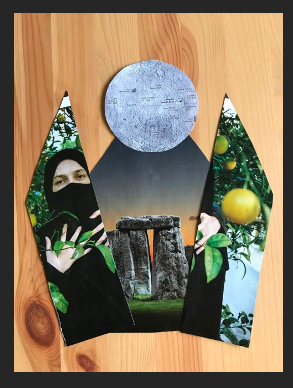
You can decorate each side of the paper – the first photo shows the inside panels of my shrine, while the second shows the front of the side panels
Collage

Creating Adjoining Tabs
· Attatching the panels. To attach the panels, you can use Sellotape on add little card tabs
· To create the tabs, I’ve added four pieces of double-sided tape to the outside of the shrine.
· Cut rectangles of card that are bigger than the pieces of double-sided tape and fold them in half.
· Peel off the backing of the tape and stick on your card tabs
· The close the shrine making sure your paper tabs are creased
Adapt these instructions and create your shrine your way. The creative options are endless from collaging your shrine, to printing out photos and gluing them in. You could even glue or sew on objects.
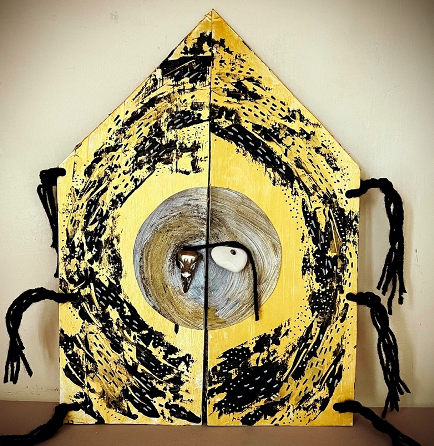
For this shrine I had used a thicker card which I painted gold, and then added the black. As it was a thicker card I only had to use a hole punch to create the joining points - to which I added some yarn as a decoration. Two additional hole punches at the front allowed me to sew on the pendant and hag stone
